Wet Felted Pictures
Wet felting with wool is so versatile. With a bit of wool, a length of bubble wrap, a spray bottle, some soap and water, you can make just about anything you can imagine. You can make boot liners, slippers, hats, pillows or a piece of artwork you can hang on your wall.
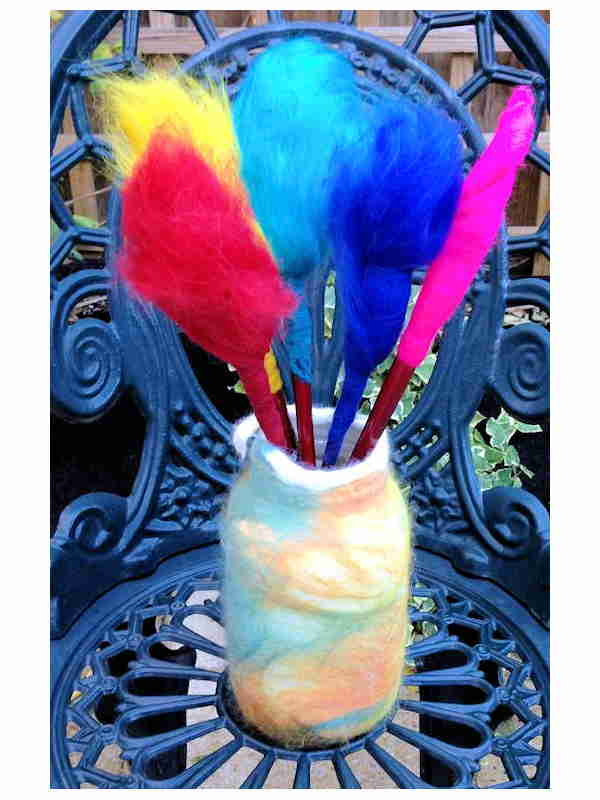
I use merino wool or corriedale for most of my felting work because I find that it felts quite quickly and evenly. I add other types of wool, silk, alpaca for added texture and colour.
To make a felted picture, the process is quite simple, though a bit time consuming.
Start by making a flat piece of wool felt. Put a large towel onto the surface of the table you will be working on. Using white merino wool, I lay down 3 layers of wool evenly across a length of bubble wrap. Gently pull the roving apart into short pieces. Lay these on the bubble wrap, overlapping each row of wool locks by about a third. Make sure that each layer is placed in the opposite direction to the previous layer so that the wool locks cross each other and intersect. I generally start by placing a layer from the top to the bottom. The second layer side to side, from the left to the right. And the third layer, working from the bottom to the top. Wool felt will shrink about 20-30 percent so make this piece larger than what you would like your finished project to be.
After the 3 base layers have been laid in place, fill the spray bottle with warm water and a bit of dish soap. Spray the wool lightly with the soapy water. Place another piece of bubble wrap over the damp wool and gently press down on the wool and rub it with your fingers and palm of your hand for about a minute. This will allow the soapy water to soak into the wool. Now carefully remove the top layer of bubble wrap. The white wool should be a bit flattened and slightly damp. This will make it easier to lay your picture onto the top surface of the wool roving.
To make a picture I start by drawing a cartoon on paper. I refer to this as I am ‘painting’ with the dyed wools.
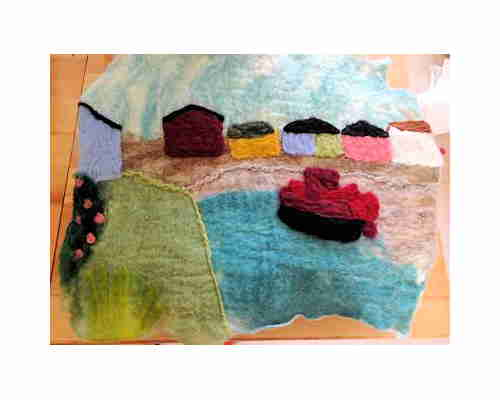
I lay down the basic landscape of the picture using dyed wools, the sky, the land, the river, the grass. I make sure that all the white wool from the previous layers is all covered and isn’t showing.

The finer details, the houses and the boat will be added later. Now it is time to wet felt the piece. I spray a generous amount of soapy water onto the felt picture. Lay down the second piece of bubble wrap onto the wool and gently press it down with the palm of your hands.
Carefully roll up the wool in the bubble wrap into a tube and roll this back and forth with your hands for about 2 minutes. Then gently unroll the wool package and straighten out the wool felt. Then roll it back up again in a different direction and roll some more. The wool will move around as you are felting, so you will need to unroll it every few minutes to move it back into shape.
Keep rolling and rewinding for about 1/2 an hour, checking every few minutes. You will see when the wool starts to felt and the fibres will bind and come together. When the felt is at a stage where the fibres are staying in place and not shifting around, then it is time to take the wool felt to the sink.
Fill your kitchen sink with hot water and a bit of soap. Fill the second basin, or a large bowl with cold water.
Remove the wool felt from the bubble wrap and gently fold it into quarters. Then dip it into the hot water. Massage the wool in the hot water for about a minute. Squeeze out the excess water and then dip the wool into the cold water and squeeze out the excess water.
Unroll the wool and re-roll it in another direction. Put the wool felt back into the hot water and continue to massage and knead the wool. Then put it back into the cold water.
The action of the kneading, and the shock of the hot and cold water will begin to felt the wool. You will notice that the structure of the wool changes. It will start to harden and also to shrink in size.
Keep kneading, and dipping in hot and cold water. You will need to change the water in the sink a few times as it warms up or cools down.
Once you are happy with the amount that the wool has felted, roll it up in the towel and squeeze out the excess water. Then hang the felted piece up to dry.

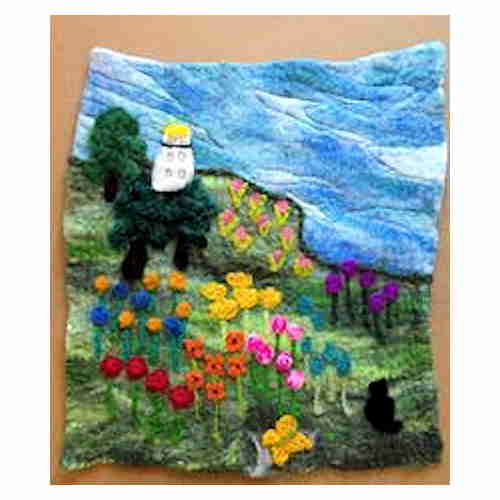
Once the felt has dried, you can then add the details to your picture by needle felting the houses, the boats and other features onto your felted picture.
Once I have finished the needle felting, then I add windows, doors, accents and finer details to the design with hand and machine embroidery.

More Felt Making Projects
How to Make Felt
Felted Placemats
Felted Hats
Felted Cat Bed
Felted Slippers
Wet Felted Easter Eggs
Feltmakings
Feltmaking (The Art of Crafts )
Feltmaking and Wool Magic: Contemporary Techniques and Beautiful Projects
Scandinavian-Style Feltmaking: A Three-Dimensional Approach to Hats, Boots, Mittens, and Other Useful Objects
First Time Felting: The Absolute Beginner’s Guide – Learn By Doing * Step-by-Step Basics + Projects
 LONGTHREAD MEDIA VIDEO
 LONGTHREAD MEDIA SUBSCRIPTIONS
HANDWOVEN MAGAZINE
PIECEWORK MAGAZINE
SPINOFF MAGAZINE
LEARN LONGTHREAD MEDIA
PAIVATAR HANDMADE
LONGTHREAD MEDIA SUBSCRIPTIONS
HANDWOVEN MAGAZINE
PIECEWORK MAGAZINE
SPINOFF MAGAZINE
LEARN LONGTHREAD MEDIA
PAIVATAR HANDMADE
 Paivatar on YouTube
Visit my YouTube channel for how-to craft videos.
Paivatar on YouTube
Visit my YouTube channel for how-to craft videos.
Or Please visit my Channel on Rumble for more how-to videos.
https://rumble.com/Paivatar
LIVE STREAMS - Paivatar Studio
KICK
TWITCH MAKERS&CRAFTING
YOUTUBE
Categories: FELTMAKING, How To