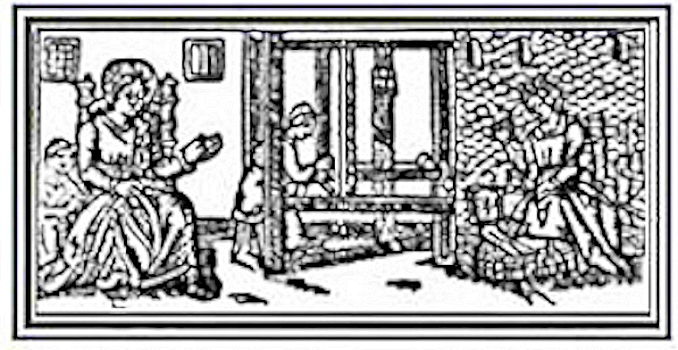
10 Steps to Warping – Step 9 – Beaming the Warp
This post has been updated and moved to:
Once the warp threads have been securely tied to the back apron rod, you are ready to begin to
wind the remaining warp on to the back beam. This part of the task is a bit easier when you
have another person to help hold the warp tension while you wind on to the back, however, it
isn’t always easy or convenient to find another weaver that is available to assist. But,
it is possible to beam by yourself, though the process is a bit slower.
The method that I use follows:
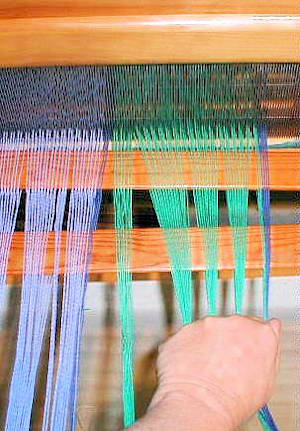
Starting at the front of the loom, I even the tension on the warp threads by tugging at them
in about 1 – 2 inch intervals, until all the threads are straight. Then I go to the back of
the loom, and turn the back beam about 1/2 a revolution. I go back to the front and again
adjust the tension. I go to the back and again wind another 1/2 a revolution.
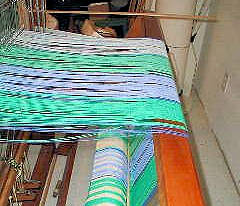
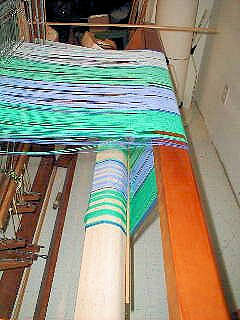
Adjust Warp Tension
Once the warp has gone around once, I place a lease stick (or dowel, paper, or old venetian
blind slats) in between the warp beam and the threads. The lease sticks keep the tension even,
smoothing out any lumps, bumps and knots in the warp. The sticks also prevent the warp threads
from tangling into each other as they wind around the beam.
Wind Warp
Again, I repeat the procedure of going to the front of the loom, and straightening out the
threads and tightening the tension all along the warp. After 1 1/4 revolutions, I place
another lease stick into the back beam.
Step 1. Choose your project and yarns.
Step 2. Determine the sett of your cloth, or how many threads per inch the fabric will be.
Step 3. Choose the correct Reed
Step 4. Calculate the Yarn requirements.
Step 5. Wind the Warp using a warping board or warping mill.
Step 6. Remove the warp chains and place them on the loom.
Step 7. Sley the Reed.
Step 8. Thread the heddles, following the draft plan.
Step 9. Wind the warp onto the back beam
Step 10. Tie the warp ends to the front beam.
Congratulations! Now you a ready to Weave!
AMAZON – Hand Weaving Books
Weaving on a Little Loom (Everything you need to know to get started with weaving, includes 5 simple projects
The Key to Weaving: A Textbook of Hand Weaving for the Beginning Weaver
The Weaver’s Companion (The Companion Series)
Learning to Weave
The Big Book of Weaving: Handweaving in the Swedish Tradition: Techniques, Patterns, Designs and Materials
The Handweaver’s Pattern Directory
A Weaver’s Book of 8-Shaft Patterns: From the Friends of Handwoven
Krokbragd: How to Design & Weave
Doubleweave: On Four to Eight Shafts
Double Weave: Theory and Practice<
Magic of Doubleweave: The Best of Weaver’s (Best of Weaver’s series)
Weaving In the Arts: Widening the Learning Circle
DIY Woven Art: Inspiration and Instruction for Handmade Wall Hangings, Rugs, Pillows and More!
>On the Loom: A Modern Weaver’s Guide
EBAY – Used Weaving Looms
BAND WEAVING
RIGID HEDDLE LOOMS
USED FLOOR LOOMS
 LONGTHREAD MEDIA VIDEO
 LONGTHREAD MEDIA SUBSCRIPTIONS
HANDWOVEN MAGAZINE
PIECEWORK MAGAZINE
SPINOFF MAGAZINE
LEARN LONGTHREAD MEDIA
PAIVATAR HANDMADE
LONGTHREAD MEDIA SUBSCRIPTIONS
HANDWOVEN MAGAZINE
PIECEWORK MAGAZINE
SPINOFF MAGAZINE
LEARN LONGTHREAD MEDIA
PAIVATAR HANDMADE
 Paivatar on YouTube
Visit my YouTube channel for how-to craft videos.
Paivatar on YouTube
Visit my YouTube channel for how-to craft videos.
Or Please visit my Channel on Rumble for more how-to videos.
https://rumble.com/Paivatar
LIVE STREAMS - Paivatar Studio
KICK
TWITCH MAKERS&CRAFTING
YOUTUBE
Categories: HAND WEAVING, How To, LOOMS